4 Basics of Hurricane Preparation

It’s time to get ready for hurricane season, which means it’s time to review your hurricane preparation emergency plan. The Atlantic hurricane season runs from June 1 to November 30, and the Pacific season runs from May 15 to November 30.

Because hurricanes can happen with little warning and cannot be prevented, the best time to prepare is now. A level head and confidence in your response are possible in an emergency. Read on for a few need-to-knows of hurricane preparation.

1. Know Your Area’s Risk for Hurricanes

Hurricanes and their devastation do not only occur along the coast. Wind, rain, landslides, flooding, and even tornadoes can affect inland residences. The best hurricane preparation practices include determining your risk so you can adequately prepare based on your location.

2. Create a Hurricane Preparation Emergency Plan

Make a plan for all members of your household, and be sure to make a plan for your pets, too. A good hurricane preparation plan should consist of:

  • Create a paper copy of important family contact information.
  • Practice your household evacuation plan. Your plan should include a designated meeting place should an emergency occur.
  • Learn evacuation roles and responsibilities.

3. Recognize Emergency Warnings and Alerts

Determine how you will receive emergency alerts, and consider signing up for community alerts and real-time notifications on your mobile device. These will help you modify and adapt your emergency plan in the event of an emergency.

Learn emergency terms and what they mean ahead of time. For example, learn the difference between a flood warning and a flood watch and a hurricane warning and a hurricane watch.

4. Gather Emergency Supplies and Resources

Stock your emergency supply kit with the proper materials, such as water, extra cash, and medications. It’s also a good idea to keep personal, medical, and financial records in your emergency supplies to aid in your hurricane preparation emergency plan.

Construct a plan for recovery and cleanup if a hurricane does hit your home or business.

Know Who to Call for Help

EnviroServe is well-equipped to provide flood response services across the United States. When you need to recover from flooding and other natural disasters, we’re here to help.

Contact us at (800) 488-0910 for 24/7 emergency response.

How to Prevent Confined Space Hazards & Incidents

Each year, hundreds of people die while working in confined spaces, and more than 60% of confined space deaths happen when others enter the space trying to rescue the other individual. While it’s hard to lose people who are doing their job, there are safety measures that can be put in place to eliminate confined space fatalities.

What is a confined space?

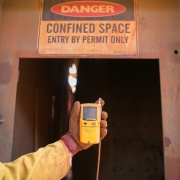
A space is considered confined if its configurations would hinder the activities of Team Members who enter, work in, or exit the space. The confined space may also increase the risk of exposure to physical injuries or a hazardous atmosphere.

By definition, a confined space:

  • Is large enough for a Team Member to enter fully and perform assigned work
  • Is not designed for continuous occupancy by the Team Member
  • Has a limited or restricted means of entry or exit

Examples of confined spaces include underground vaults, tanks, storage bins, pits, vessels, silos, and other similar areas.

Permit-Required Confined Space

Some spaces require a permit before entry into the space. A permit-required confined space meets the same requirements as a confined space and has one or more of the following:

  • Contains or has the potential to contain a hazardous atmosphere
  • Contains a material with the potential to engulf someone who enters the space
  • Has an internal configuration that might cause an entrant to be trapped or asphyxiated by inwardly converging walls or by a floor that slopes downward and tapers to a smaller cross-section
  • Contains any other recognized serious safety or health hazards

Preventing Confined Space Incidents

Types of Confined Space Hazards

Depending on the type of confined space, there can be multiple different hazards present, but unseen. Taking the time to monitor for hazards before entering the confined space may prevent you from any possible illnesses or even death. Before entering, check for:

  • Hazardous Atmospheres
  • Engulfment Hazards
  • Hazardous configurations
  • Any additional hazards

Equipment, Training & Permits

Before entering the confined space, it’s also important to make sure you have the proper equipment, training, and permits.

Equipment

  • Ventilation equipment
  • Gas monitoring equipment
  • Respiratory protection
  • Harnesses, lanyards, and rescue systems

Training

Make sure everyone involved in the process has the proper training they need to perform their roles correctly and safely. This can include individuals such as the entry supervisor, attendant, authorized entrants, and emergency rescue personnel.

Permits

Make sure all the proper permits have been completed before entering the confined space. Continue to monitor the confined space as work is being done to ensure those involved are still safe in their work.

Confined Space Cleaning Assistance

EnviroServe Team Members are trained in OSHA 29 CFR 1910.146 confined space training and can help you safely tackle your cleaning needs while preventing hazards and incidents. Contact us or call (800) 488-0910 to learn more.

Lockout Tagout | EnviroServe, a Savage Company

6 Steps to Properly Conduct a Lockout Tagout

When equipment forgoes routine or emergency maintenance — especially when the maintenance is being performed directly on the equipment or within the general vicinity — oftentimes a lockout tagout is required to better ensure workplace safety.

A lockout tagout is the control of hazardous energy through energy control devices. This step in the maintenance process is very important as each year injuries and fatalities result from the lack of taking proper precautions. It should come as no surprise that “Control of Hazardous Energy (Lockout Tagout)” is one of the Occupational Safety and Health Administration’s Top 10 Most Cited Standards each year.

How to begin a proper lockout tagout

Before you can properly conduct a lockout tagout, it is crucial to have a basic understanding of hazardous energy and the personnel types associated with the lockout tagout process. From there, you will be able to better understand the six necessary steps of a lockout tagout process.

Understanding hazardous energy

Hazardous energy comes in many forms and originates from various sources. Regardless of its origin, each type shares the potential to cause harm to personnel and those in the surrounding area. Hazardous energy may include:

  • Mechanical
  • Chemical
  • Electrical
  • Hydraulic
  • Pneumatic
  • Thermal

Roles associated with the process

When it comes to lockout tagout, there are two classifications of personnel involved in the process: authorized and affected.

  • Affected Personnel – An affected personnel can be defined as a person(s) whose job function is to operate or use the piece of equipment that is currently under lockout tagout. This also includes those who work in an area that the lockout tagout is currently preventing them from accessing. In other words, the job of this person or group has been “affected” by the equipment shutdown.
  • Authorized Personnel – An authorized personnel can be defined as a person(s) who locks or tags equipment in order to provide service and maintenance to that equipment or work safely within the area of the equipment. These individuals must receive proper training and are responsible for implementing the lockout tagout procedures.

Steps for conducting a lockout tagout

1. Preparation

The first step to completing a proper lockout tagout is preparing the equipment to be powered off. This involves investigating and identifying all power sources used by the machine and understanding the appropriate procedures necessary to disconnect or eliminate them. This often involves looking at the equipment’s manual or consulting with personnel who are familiar with its workings.

2. Shut Down

After you have properly prepared the equipment for a lockout tagout, physically power off all identified sources of energy, noting that some equipment may require multiple steps to power off. It is vital you notify all affected employees of the impending equipment shutdown before the shutdown, sharing details such as what equipment will be affected and how long they will be powered off. This will prevent personnel from entering the area or attempting to power on the equipment while others may be in harm’s way.

3. Isolation

The next step for a correct lockout tagout is isolating the machine from all energy sources. Although the power has been removed, you want to further prevent anything from turning back on. This can include closing valves, disconnecting cords, blocking moving parts, flipping circuits, or disengaging lines.

4. LO/TO Application

Following machine isolation, complete the locking and tagging of each energy isolation location in the off position. Various devices exist for different pieces of equipment, but they all share the purpose of locking the power transfer in a safe position so it cannot be moved. From there, a lock with a tag indicating who owns it is placed on the device. Each authorized employee should apply their own specific lock and tag. At no time should another employee remove a lock that does not belong to them.

5. Check for Stored Energy

Although equipment has been powered off and the energy sources have been isolated, this does not guarantee all hazardous energy has been eliminated. For example, electrical energy may be stored in a capacitor, or mechanical energy may be stored in a compressed spring. For this reason, the next step in the lockout tagout process should be to check for any stored energy to relieve, restrain or release this stored energy.

6. Isolation Verification

Once the personnel have checked for stored energy, the next step in the lockout tagout process is verifying all prior efforts have been successful. First, ensure all personnel and tools are away from the machine. Then an authorized employee should attempt to power on the equipment. If the lockout tagout was completed properly, the equipment should not move, energize, or produce any other action that would indicate the presence of hazardous energy. If this is the case, work can be safely performed on or near the equipment. If any indications suggested the presence of power, revert to prior steps to identify additional sources of stored or potential energy.

Safely Restoring Power

After the six steps of lockout tagout have been completed and maintenance has been performed, the power of the equipment must be restored. To do this, one must ensure all tools and debris has been removed from the area. Personnel must remove the lockout tagout device(s) from the energy isolation location(s). Notably, the personnel who applied the lock and tag should be the only person to remove the lock and tag to ensure personnel safety and prevent equipment from being powered on while any individuals are still in harm’s way.

Lockout Tagout Assistance

For more information on lockout tagout procedures used in industrial cleaning and environmental remediation, reach out to EnviroServe. With over 30 years of experience in non-hazardous and hazardous waste disposal and transportation, our team is trained and certified to meet your company’s needs. Call (800) 488-0910 for help navigating your waste management requirements today!

Fatigued Driving

It’s Daylight Saving Time: Prevent Fatigued Driving with These 5 Tips

This weekend is Daylight Saving Time, followed by Drowsy Driving Prevention Week

Did you know that you are three times more likely to be in a vehicular accident if you are fatigued?

Fatigued driving is a prevalent issue in the busy lifestyle of many Americans, especially when it comes to commercial drivers. And with Daylight Saving Time looming around the corner, darker evening commutes may augment fatigue.

It’s important to be aware of the risks and causes of fatigued driving, including:

  • Inadequate sleep
  • Strenuous physical or mental activity
  • Sleep disorders
  • Changes in daily routine

These factors can affect your circadian rhythm, the natural sleep-wake cycle, and ultimately result in reduced alertness behind the wheel.

The Risks of Fatigued Driving

Each year, the National Highway Traffic Safety Administration estimates that fatigued driving causes 100,000 police-reported crashes, 1,550 deaths, 71,000 injuries and $12.5 billion in losses. These estimates are likely much lower than the real picture due to the lack of transparency and testing processes when it comes to those involved in the accidents.

The most dangerous risks associated with fatigued driving accidents are those that involve commercial motor vehicles. Due to their size and weight, they are more likely to cause costly damage and more severe injuries to those involved.

How to prevent fatigued driving

1. Recognize the signs of fatigued driving

The first step to preventing fatigued driving incidents is identifying the warning signs. Common indications include the following:

  • Yawning
  • Frequent blinking
  • Foggy memory or disconnected thoughts
  • Missing an exit or turn
  • Drifting lanes or hitting the rumble strips

If you’re experiencing any these signs, pause your travels until you are well rested.

2. Commit to being well rested

Preventing fatigued driving requires you to be alert and properly rested. Sleep experts recommend the average adult should get between 7 to 9 hours of sleep each night. This is best done by establishing a nightly routine and committing to it. When you live by a consistent sleep schedule, you recharge your body physically and mentally.

3. Abide by the Hours of Service

The Federal Motor Carriers Safety Administration recognizes the risks associated with fatigued driving and established Hours of Service Regulations. These regulations limit property-carrying drivers to 11 hours of driving each day within a 14 hour period.

Under these regulations, drivers must also take 10 consecutive hours off duty before driving again, and they may not drive after logging 60/70 hours on duty or driving dependent upon their ruleset. In order the reset that limit, the driver must take 34 consecutive hours off duty.

4. Practice safe driving strategies

To minimize the effects of fatigued driving, an emphasis should also be placed on practicing safe driving habits. When a vehicle is in motion, keep your eyes moving. You should constantly be looking ahead and checking your mirrors to maintain a 360-degree view of your vehicle. Sleepiness also affects your reaction time and decision-making ability, so it’s vitally important you limit or eliminate all distractions to ensure you mind your speed, following distance and roadway awareness.

5. Avoid utilizing alertness “tricks”

Drivers tend to rely on alertness tricks to prevent fatigue, but these tricks are not a real cure for fatigue and are more likely to cause a false sense of security. Instead of turning up the radio, drinking coffee, or opening a window for some fresh air, pull over and allow your brain to rest.

Stay safe

For more information on Drowsy Driving Prevention Week, visit: https://drowsydriving.org/.

For assistance with safe transportation of waste or emergency response, reach out to EnviroServe at (800) 488-0910! Our Team specializes in “where you need us, when you need us” service with 30 years of experience over the road.

Prepare Your Rail Yard for Snow & Ice with Hi-Rail Vac Truck Service

Can you feel it?

The cold weather months are upon us, which means…. Snow. Ice. Slush.

It also means an increase in rail traffic as suppliers move away from road travel during months with potentially treacherous road conditions. And while shipping via rail is an efficient and cost-effective way to move goods, it’s only safe when tracks are clean.

Before Cold Weather Arrives

The time to prevent derailments is before snow and ice riddle the rail yard as spilled meal, corn, and other lading on your tracks can endanger your team, cargo, the environment, and the community. Consider a hi-rail vac truck service to remove contaminated and unwanted materials from track beds, such as EnviroServe’s Guzzler High-Rail Vac Trucks and hi-rail vac truck fleet. Hi-rail vac trucks are:

  • Rail-ready
  • Boom-equipped
  • Self-contained

These vacuum trucks can be deployed by RWPT and Class I contracted personnel quickly in case of emergency, or you can schedule service for a later date.

Regularly Inspect Track

Metal expands in the heat and contracts in the cold, so weather fluctuations can cause cracks that lead to broken rail. Inspect your rail yard frequently to repair any damages immediately so they don’t risk someone’s safety. Pay special attention to crossings and flangeways where foot traffic and cars may compact snow and ice. You’ll want to keep rails clear as much as possible.

A hi-rail vac truck can also be used to clear tracks of ongoing winter debris, like spilled cargo or stubborn weather buildup.

In Case of Emergency

Should you experience a derailment, need help repairing track, want to clear tracks with a hi-rail vac truck, or need other rail services, call the “when you need us, where you need us” experts at EnviroServe.

Contact (800) 488-0910 to learn more.

hazardous waste drums

4-Step Guide to Identifying Hazardous Waste

Take a look around you. The computer screen in front of you, the cell phone that just vibrated in your pocket, and the loose-leaf paper on your desk all share something in common: hazardous waste. Each of these items—and the manufacture of many other goods—produces hazardous waste as a byproduct.

Contrary to many beliefs, the production of hazardous waste is quite frequent. From 2001 to 2017, the Environmental Protection Agency (EPA) reported that the United States generated between 20.3 to 29.1 million tons of hazardous waste each year. That’s almost 80,000 tons per day on the high end! Although this number may sound astounding, it makes more sense when you consider the breadth of sources that produce it. Activities such as manufacturing, water treatment, farming, construction, hospital lab work, and so many other industries all result in creating hazardous waste. Households even generate it in the form of batteries, electronics, unused solvents and pesticides.

What is a Hazardous Waste?

Hazardous waste is waste that exhibits properties that make it dangerous, or capable of causing harm, to human health or the environment. This waste can come in solid, liquid or gaseous form which results in different routes of exposure. Whether the material can cause harm from leaching into groundwater used for drinking or inhaled via particulate matter in the air, many regulations are in place to ensure hazardous waste is disposed of properly to protect our communities and the environment.

How to Identify Hazardous Waste

When identifying hazardous waste, there are four vital questions that must be answered:

1. Is the material a solid waste?

In order for a material to be a hazardous waste, it must first be considered a solid waste. Solid wastes are materials that are either discarded by being abandoned, inherently waste-like, or recycled in certain ways. Although it may seem contradictory, a solid waste can be solid, semi-solid, liquid, or a contained gas.

Examples of materials the Resource Conservation and Recovery Act (RCRA) identifies as solid waste include:

  • Garbage or refuse
  • Sludge from a wastewater treatment plant
  • Byproducts from a waste supply treatment plant or air pollution control facility
  • Discarded material resulting from industrial, commercial, mining and agricultural operations, or from community activities

If the material does not meet the definition of a solid waste, then it cannot be considered a hazardous waste.

2. Is the waste excluded from the definition of solid waste or hazardous waste?

It is important to note that certain materials are excluded from the solid waste or hazardous waste definition due to Congressional action or EPA Rulemaking. This may be due to public policies, economic impacts, the lack of significant data, or the impracticability of effectively regulating the waste.

If the material is explicitly excluded, then it is not a hazardous waste.

For more details on exclusions, visit CFR section 261.4(a) and 261.4(b).

3. Is the waste a listed or characteristic hazardous waste?

When hazardous, a waste will have at least one listed waste code associated with the material or meet at least one of the characteristics of a hazardous waste.

Although there are hundreds of specific listed waste codes, they are separated into four lists:

  • F-List – Identifies hazardous wastes from common manufacturing and industrial processes. These wastes are also called wastes from non-specific sources because the processes that create them can occur in different sectors of industry.
  • K-List – Identifies hazardous wastes from specific industries and are also called source-specific wastes. Examples of these specific industries include pesticide manufacturing, steel production, and petroleum refining.
  • P-List and U-List – Identify hazardous wastes that are unused chemicals in their commercially pure grade, technical grade, or a formulation for which the chemical is the sole active ingredient form that is being discarded.

Additionally, there are four properties that determine a characteristic waste: ignitability, corrosivity, reactivity and toxicity. When one or more are present in a waste, the material is regulated as hazardous.

  • Ignitability – Includes liquids with a flash point below 140 degrees Fahrenheit, spontaneously combustible solids, and ignitable compressed gases.
  • Corrosivity – Refers to wastes with a pH of less than or equal to 2 (acidic) or a pH of greater than or equal to 12.5 (basic).
  • Reactivity – Refers to waste that may be unstable under normal conditions, may react with water, may release toxic fumes, or may detonate under normal conditions or when heated.
  • Toxicity – Refers to waste containing one or more of these 39 constituents that are harmful when ingested or absorbed such as Arsenic, Benzene, or Cadmium.

If the discarded material does not have a single waste code or meet one of the four characteristic waste properties, the material is not subject to RCRA Subtitle C Regulations, and it is not a hazardous waste.

4. Is the waste delisted?

The last question we must answer to determine if a material is a hazardous waste is whether the material is delisted. Delisted wastes are wastes that were specifically petitioned to the EPA or another authorized regulatory agency to not be considered a hazardous waste. To do this, the generator must reach out to one of the ten regional EPA offices with their data.

If the material is delisted, it is not classified as a hazardous waste.

How can I get help with my hazardous waste?

For more information on hazardous waste disposal, reach out to EnviroServe. With 30 years of experience in hazardous and non-hazardous waste disposal and transportation, we can help you navigate waste requirements. Call (800) 488-0910 for all your waste management needs.

Safe + Sound Week | safety and health program

Staying Safe and Sound: Why a Safety and Health Program is Important

Are you participating in Safe + Sound Week*? Find out why an effective safety and health program can benefit your company.

Each year businesses create plans to grow and adapt within their market, including procedures and tactics used to protect the health, safety, and well being of their team members. Regardless of the industry, creating and implementing an effective safety and health program is vital.

What is a safety and health program?

A safety and health program, also known as a safety management system, is designed to address and prevent occupational incidents and accidents within the workplace. Each program is customized to best suit industry needs and address varying hazards requiring specific methods of control to protect both workers and equipment.

Why is a safety and health program important?

Creating and maintaining an effective safety and health program yields many benefits. For starters, effectively controlled hazards and safe work practices help prevent injury and illness. Throughout history, worker safety has greatly improved; however, there is still plenty of progress to be made. In recent years, an average of 5,000 workers have died on the job annually—roughly 14 people per day—and an additional 3.6 million have suffered a serious job-related illness or injury.

These incidents don’t just affect the individual harmed, but also the business’ bottom line. An effective safety and health program reduces the costs of unnecessary medical bills, workers’ compensation premiums and loss of productivity. Notably, in 2018 alone, the total cost of work-related injuries was $170.8 Billion – yes, that is Billion with a B.

Executing a safety and health program also allows a business to better remain in compliance with regulatory agencies and abide by work related laws.

How do I begin a safety and health program or expand on one already in place?

1. Establish safety as a core value

Before an effective safety and health program can be applied, you must focus on its foundation: safety built into the workplace culture and shared by all. This is best accomplished by starting with the leadership of the organization. Leading by example will express that safety is valued and held to a high standard in the workplace. The message should be personal and should strongly support that everyone returns home safely.

2. Develop a program

If you do not have a safety and health program or are just recently implementing one, the Occupational Safety and Health Administration (OSHA) recommends beginning with the basics. This grants the ability to focus on company-specific routines and procedures. As additional needs are addressed, the program can evolve to better fit company defined goals, thereby enhancing overall business operations. An effective program will be proactive rather than reactive when it comes to addressing any area of concern. Additionally, some businesses, laws, or regulations may require additional features be included in the program.

3. Gather worker feedback

In order for a safety and health program to be effective at mitigating risks, unprotected hazards must first be identified, and incidents and near-misses must be reported. To do this, worker participation in the program should be encouraged without any fear of retaliation.

Worker participation is significant to the program as they tend to be most familiar with day-to-day tasks. Through worker involvement, the company can also tap into the collective knowledge of the team and unique perspectives on how to solve an issue. This involvement will allow the team to better work as a unit and ensure a solution is implemented through its completion.

After a new program has been produced, the team should be trained on all components of the program.

4. Improve as you go

As a company’s safety and health program continues to expand, it is important to make improvements based on worker feedback, industry recommendations, or technology advancements. Ensure that each time the program is updated, that the changes are communicated to your team.

How can I learn more?

Find out more about the importance of a safety and health program and how to get involved with Safe + Sound on the OSHA website.

———————

*OSHA’s year-round Safe + Sound campaign encourages all workplaces to create and implement a safety and health program with one week each August dedicated to recognizing success stories and sharing the latest trends in workplace safety. This year, Safe + Sound Week runs August 10-16, 2020.

stop on red: improving roadway safety and awareness

Stop on Red: Improving Roadway Safety and Awareness

In honor of National Stop on Red Week (August 2-8, 2020),  let’s talk about roadway safety.

Every time you get behind the wheel, roadway safety should be at the forefront of your mind. The potential for accidents while driving lurks around every corner, with road intersections proven to be one of the most dangerous places. In fact, more than two people are killed in the U.S. daily and hundreds of thousands more are injured as a result of drivers running red lights. But there’s a catch: every one of these accidents could be prevented if basic roadway safety rules were obeyed.

Why is Roadway Safety Important?

Although completely eliminating road traffic incidents is unlikely, there are steps drivers can take to significantly reduce the number of accidents, particularly in intersections. A survey conducted by the AAA Foundation for Traffic Safety found that 85% of drivers believe it is highly dangerous to speed through a red light, yet 31% admitted to doing so within the last 30 days. Roadway safety is taught by both state and federal leaders, but if citizens choose to still ignore the rules, accidents will ensue.

Roadway Safety Awareness

Despite roadway safety being a major concern for drivers, awareness while on the road is an anomaly. When polled, 76% of Americans rated themselves as good drivers, while 93% admitted to engaging in at least one unsafe driving behavior. Whether that be racing a light purposefully or partaking in other contributing factors such as distracted driving, all motorists have room for improvement. Common examples include:

  • Texting or calling while driving
  • Speeding
  • Disobeying traffic lights and signs
  • Disregarding the flow of traffic

What is National Stop on Red Week?

Due to the severity of roadway safety incidents, specifically relating to red lights, the National Coalition for Safer Roads (NCSR) and many other organizations host National Stop on Red Week annually. National Stop on Red Week first originated in 1995 as a campaign introduced by the Federal Highway Administration to help educate drivers on roadway safety and the risks of running red lights.

This year, the event runs August 2-8, and each day of the week tackles a different safety angle:

  • Day 1 | Sunday, August 2 – Introduction
  • Day 2 | Monday August 3 – The Numbers
  • Day 3 |Tuesday August 4 – The Trends
  • Day 4 |Wednesday August 5 – Stop on Red
  • Day 5 |Thursday August 6 – Get the Facts
  • Day 6 | Friday August 7 – Red Light Cameras Save Lives
  • Day 7 | Saturday August 8 – Take the Pledge

For more information and updates, visit the NCSR website.

So what can your company do to improve roadway safety?

Roadway safety is a commitment to protecting yourself and those around you. To lessen roadway incidents, implement annual driver safety courses for your Team Members focused on defensive driving and/or developing good habits and look into incorporating technology to better monitor and coach your team. Many electronic logging software programs can collect data regarding your fleet’s speed over the road and various at-risk behaviors such as hard accelerations, braking, or cornering. And with weekly or monthly inspections, you can see where you should focus your efforts, including the installation of safety devices such as dashboard cameras, lane departure warnings, and assured clear distance systems.

Remember: when you’re behind the wheel, it’s your responsibility to keep yourself and others on the road safe. Encourage your teams to be respectful of other drivers and obey traffic laws.

———————

EnviroServe specializes in “where you need us, when you need us” service utilizing the right equipment and team for the job. Contact (800) 488-0910 for emergency response services and help safely completing environmental remediation, waste management and safe transportation of hazardous and nonhazardous materials.

EnvrioServe Team Member | Create a heat illness prevention plan

How to Create an Effective Heat Illness Prevention Plan

Each year, heat-related illnesses claim the lives of workers across the country and contribute to many other occupational injuries. To ensure you are preventing occupational heat stress and that your team is protected, we recommend a Heat Illness Prevention Plan be put into place.

What is a Heat Illness Prevention Plan?

A Heat Illness Prevention Plan is a written commitment for how a company will prevent incidents and protect their employees from heat stress on the job. According to the Occupational Safety and Health Administration (OSHA), employers are responsible for providing a workplace free of known safety hazards—heat being one of them. Methods for working in hot conditions and controls used to mitigate the hazard should be addressed in a heat-specific plan or included in your Injury and Illness Prevention Plan.

Does your company have a plan put in place to minimize worker exposure to heat? Consider these steps for establishing an effective Heat Illness Prevention Plan.

1. Evaluate the Need for a Heat Illness Prevention Plan

When creating a Heat Illness Prevention Plan, remain conscientious of the consequences associated with heat-related illnesses and whether they pertain to your industry. In 2015 alone, exposure to environmental heat led to 37 work-related fatalities and an additional 2,830 nonfatal injuries resulting in days away from work.  If proper steps had been taken to create and train workers on heat exposure procedures, many (if not all) of the reported deaths could have been prevented.

2. Define Roles and Responsibilities

Before creating a Heat Illness Prevention Plan, roles and responsibilities affiliated with the plan have to be determined. Three common roles include:

  • Owner – a plan owner is responsible for defining the scope of a Heat Prevention Illness Plan. This individual or team should be familiar with company workflow processes and should be able to put controls in place to best reduce risk of heat-related illness. They should also be responsible for reviewing and updating the plan annually.
  • Administrator – the administrator is responsible for implementing the program into the workforce. Oftentimes, this role is held by a field supervisor or coordinator. An administrator ensures that all workers understand and abide by the key concepts of the plan. They are also responsible for certifying that the proper controls are employed both in-house and in the field.
  • Team Members – The Team Members are responsible for understanding the program and asking questions when they arise. The Team Members should also be able to identify when heat stress may be a hazard, recognize the signs and symptoms of heat-related illness, and be versed in the administration of basic first aid.

3. Create Best Practices and Procedures

The next step is to create the best practices and procedures that will be included in the Heat Illness Prevention Plan. Special attention should be paid to the hazards specific to your industry and line of work. Although templates can be found online, no single plan should be used as a one-size-fits-all solution. This can serve as a base, but each plan should be tailored to meet your specific needs.

When developing your best practices and procedures, make sure to address the following:

  • What job tasks are likely to be impacted by heat stress?
  • What controls can be used to minimize the risk?
  • How will workers be monitored for signs of illness?
  • What steps should be taken if it is believed someone is suffering from heat stress?

Additionally, it is important to ensure all practices and procedures are thorough but easy to follow and implement on the job.

4. Train Team Members

After you have established your Heat Illness Prevention Plan, you must provide your team with adequate training on the processes and procedures. OSHA recommends breaking training into three sessions. The first session should cover a basic heat stress overview along with the effects of heat-related illness. The next sessions should focus on how to recognize symptoms and respond to heat stress, and the last session should be specific to the plan controls and procedures.

5. Review and Update Frequently

To ensure that your company’s Heat Illness Prevention Plan is up to date, review your plan annually and make any necessary updates. By frequently updating your plan, you are ensuring the safety of your Team Members.

For a more comprehensive look at how to create a Heat Illness Prevention Plan, review criteria for a recommended standard put together by the Department of Health and Human Services, the Center for Disease Control and Prevention, and the National Institute for Occupational Safety and Health.

———————

EnviroServe specializes in “where you need us, when you need us” service utilizing the right equipment and team for the job. Contact (800) 488-0910 for emergency response services and help safely completing environmental remediation, waste management, and strenuous work both indoors and out.

Request Service